Paid Membership Using Drupal’s Ubercart


We frequently have client projects asking for paid membership with Drupal websites. No single module exists at this point, so we developed our own setup procedures for this by combining a series of existing modules. Step-by-step instructions are included below:
Specific modules used for paid membership:
- ‘Roles’ (uc_roles, as part of Ubercart)
- ‘Recurring Fees’ (uc_recurring)
- ‘Recurring Fees – Hosted’
- ‘Authorize.net’ (as part of Ubercart, not CIM module)
- ‘Ubercart Views’ for managing orders
- Payment, Credit card, Test Gateway (all parts of Ubercart)
We’re planning to write a module to automate this flow and hide the ‘shop like’ functionality of Ubercart, but before this – let’s describe how to build paid membership, step by step:
Step 1 – Create a member role (if you already done this you may skip this step)
Go to ‘User Management’ -> ‘Roles’ and add new role e.g. ‘member’. Remember to assign all necessary permissions (‘User Management’ -> ‘Permissions’) with this role. Users will only pay for something really useful and attractive – like unique content or … some kind of game?)
Step 2 – Create a simple “membership” product (if you have already done this, skip this step, also)
Go to ‘Create Content’ -> ‘Product’ and create new product - e.g.
- Title: “Paid Membership”
- SKU: “Membership”
- Price: $1
- All other fields are not applicable to our project
Step 3 – Set up Ubercart features – this is the base for your module
Go to ‘Store Administration’ -> ‘Configuration’ -> ‘Product Settings’ -> ‘Edit’ -> ‘Product Features.’ If you enable all modules above, you probably have two features: Role Assignment and Recurring Fee – that’s really what we need!
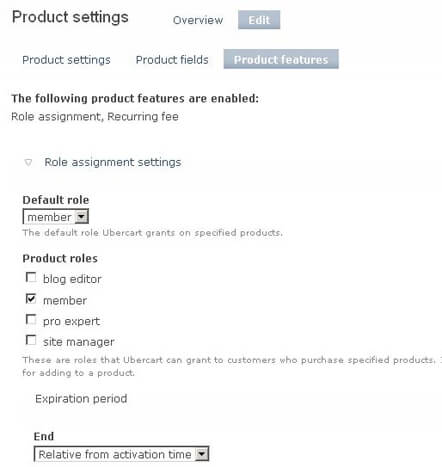
Role assignment required settings:
- Select your role: e.g. ‘member’
- Set ‘Default Expiration’: e.g. 1 year (this can be 1 day for testing )
Recurring Fee required settings:
- ‘Credit Card’ as payment method
- Checked ‘attempt to process recurring fees during checkout’ checkbox
- ‘Return a failed message and do not complete checkout’ for actions
Save.
Step 4 will make it work!
Step 4 – Add features for membership product – main work!
Go back to our product – “Content Management” -> ‘Content’. Select “Paid Membership’ node and click ‘Edit’. Now you have to have 2 sub-tabs: ‘Product’ and ‘Features’ – select ‘Features’ here. On the ‘Select Dropdown’, add a new feature ‘Recurring Fee’ click ‘Add’.
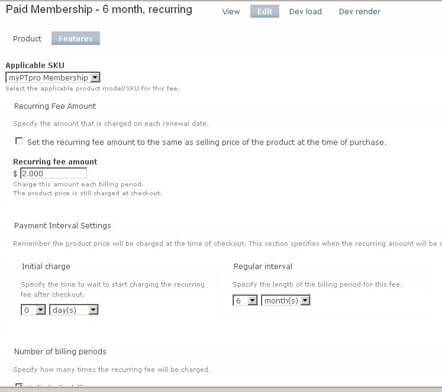
On the next page you can:
- Set recurring fee amount, e.g. ‘$2’ (or you can set the recurring fee amount to the same amount as the selling price of the product – very useful)
- Set payment interval with separate initial and regular interval – e.g. one year (or one day)
- Set number of billing periods (unlimited by default – but you can set any period here)
Save. Now go back to ‘Paid Membership’ -> ‘Edit’ -> ‘Features’ select new feature ‘Role Assignment’ and click ‘Add’.
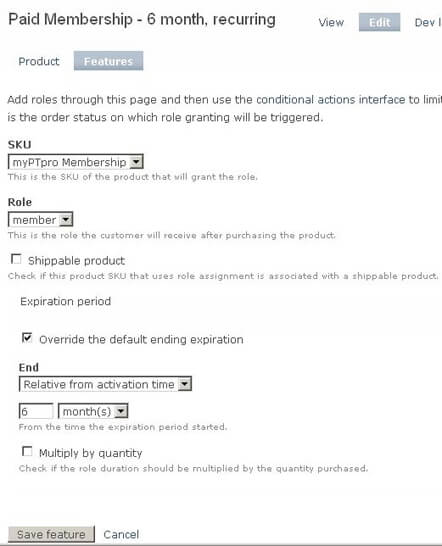
On the next page:
- Select SKU (e.g. membership) and role (e.g. member) for dropdown
- Overwrite expiration period (not required)
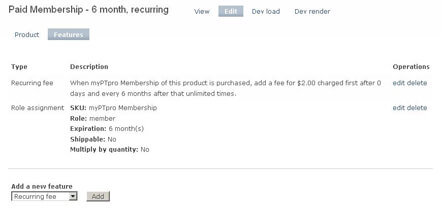
Two key notes:
- As I’ve mentioned, both Roles and Recurring Features are connected to the product SKU. If the SKU changes, everything would been broken until you re-save both features.
- If you change the expiration period, do not forget to change it both for Role and Recurring Features.
While this process may seem lengthy, you can actually complete this effort in just a few minutes.
Now let’s talk about some final settings―
Step 5 – Final settings – Part 1 of 3- Payment and (some long descriptions)
For payment, I used Authorize.net gateway. Ubercart can control recurring billing with Authorize.net in two ways:
- Using ARB
- Using CIM and cron
ARB (automated recurring billing) service means that all operations are handled on the Authorize.net side. However, ARB is not useful in our case as we need to know when payment is failed to renew user memberships. A better option is to store CIM (customer information management) ID in our DB and use it (CIM ID) to create a new order that is a recurring fee. That order is processed on our side and we renew the user membership after this order is completed. Or, we revoke membership if the order is failed.
Important notes that will save time:
- Do not use the ‘uc_cim’ module for recurring payment as it did not work during testing. Instead, use ‘Authorize.net’ (as part of Ubercart, not ‘uc_cim’ module) and ‘Recurring Fees – Hosted’ module (as part of uc_recurring).
- Until your Authorize.net live account is in test mode – you will not have the ability to test this – CIM data (the base) is not saved in TEST MODE.
Step 5 – Final settings – Part 2 - emails and conditional actions
Email – the ‘uc_roles’ module sends several emails through the ‘conditional actions’ module when role is granted, expired, going to expire, etc. Go to ‘Store Administration’ -> ‘Conditional Actions’ -> ‘Overview’ page and you will be able to edit the text of these emails and (presumably) disable some of them.
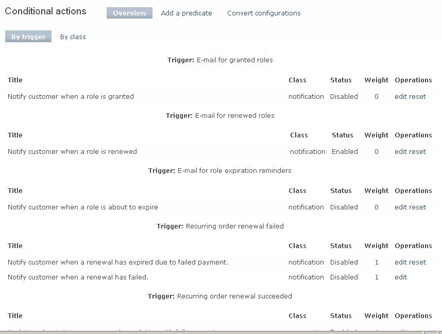
Also I’ve added ‘store owner email’ to role expiration email receivers. This will notify admin. when the recurring payment fails.
Notes:
- Some Ubercart emails are sent to ‘Store_Admin’. Be sure to go to ‘Store Administration’ -> ‘Configuration’ -> ‘Store Settings’ -> ‘Edit’ and fill ‘E-mail Address’ here. Otherwise, you will have a user error - something like “enable to send email” in ‘ca’ module during checkout.
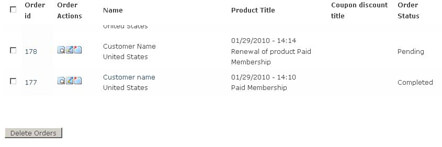
Step 5 – Final settings – Part 3 – orders list
Just few words here about ‘Ubercart View’ – this allows you to make order management easy! For example, you can delete all test orders in one click! Also with this module, I’ve output the product name in the orders list. The product name identifies if the order is the initial one or the recurring order (very useful).
Finally, I’d like to share some thoughts about the future module―
- main goal of the module is to hide ‘shop like’ functionality of Ubercart during membership signup (no shopping cart, no “product page” etc)
- and to have membership settings such as price and period on one page (that will be available even if you don’t have permissions to edit the product)
Relevant Links:
http://www.myptpro.com
http://drupal.org/project/ubercart
http://drupal.org/project/uc_recurring
http://drupal.org/project/uc_views
We hope these instructions may be helpful to you. If you have any questions or comments, please feel free to respond or contact us directly.